


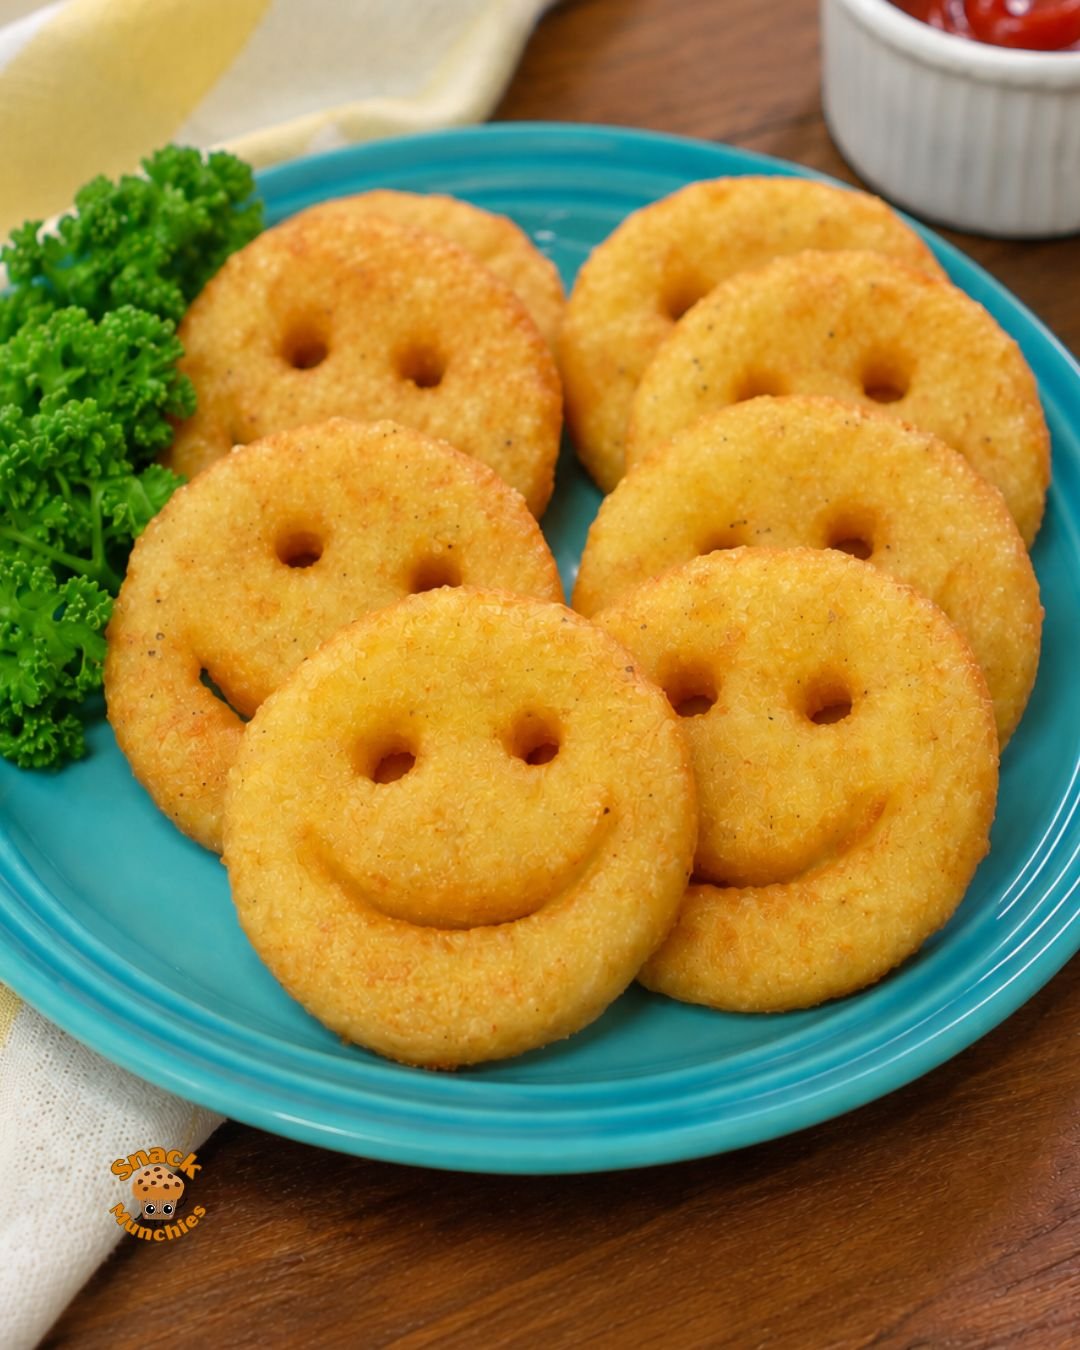
There is something slightly unfair about food that is both crispy and smiling at you.
You know it’s just potato.
You know you’re going to eat it.
And somehow those tiny potato faces still make the whole plate more fun.
These homemade potato smileys have everything you want from a good potato snack. The outside fries until crisp and golden, while the middle stays soft, fluffy, and savory. A little black pepper gives them warmth, and optional chili powder adds just enough heat to make them interesting for the adults hovering around the snack plate.
And yes, these are absolutely fun for kids.
But calling potato smileys “kids’ food” feels a little misleading when the grown-ups are usually the ones stealing the crispiest ones.
The homemade version is surprisingly simple too. Boiled potatoes are mashed and mixed with cornstarch, breadcrumbs, and seasonings. After a quick chill, the dough is rolled out, cut into circles, and given those familiar little faces with nothing more complicated than a drinking straw and spoon.
Then into the hot oil they go.
A few minutes later, you’ve got golden potato smileys waiting for ketchup, garlic dip, spicy mayo, or whatever sauce happens to be closest.
The only real problem?
Fifteen suddenly doesn’t sound like very many.
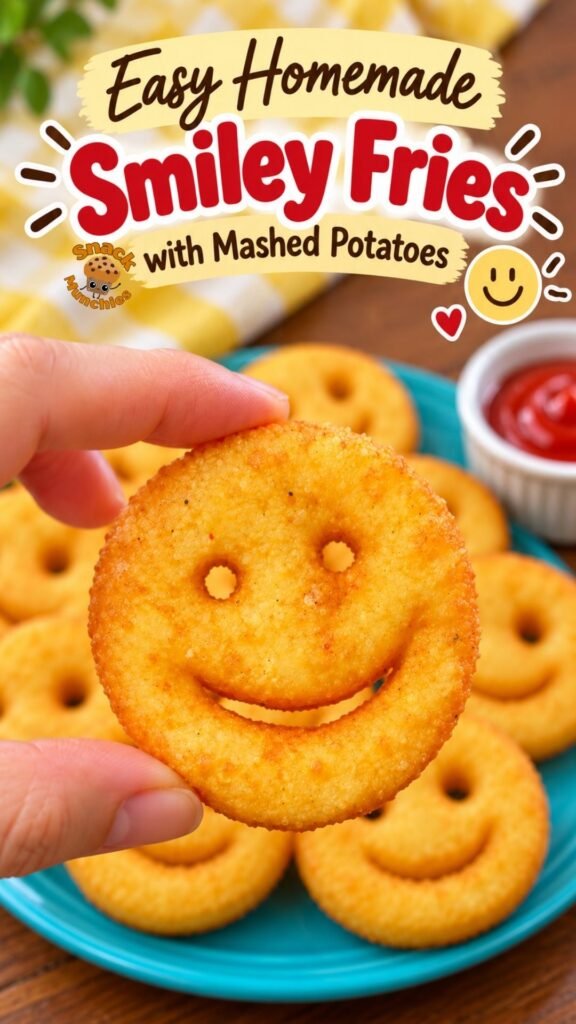
Why You’ll Love These Homemade Potato Smileys
Crispy Outside, Fluffy Inside
That contrast is the whole reason to make them.
The outside develops a golden crust in the hot oil, while the mashed potato center stays tender and fluffy.
You get a little crunch first, followed immediately by warm, seasoned potato.
Basically everything a potato snack should be doing.
They’re Actually Fun to Make
There is something strangely satisfying about turning a sheet of potato dough into a collection of tiny smiling faces.
You don’t need a special potato smiley mold either.
A round cookie cutter makes the face, a straw makes the eyes, and the curved edge of a spoon makes the mouth.
Simple.
And once you make the first smile, you’ll probably want to keep going.
You Can Adjust the Seasoning
Keep the mixture simple with salt and black pepper, or add chili powder for a gentle kick.
Making them for younger kids?
Skip the chili.
Want a milder smoky flavor instead?
Paprika works nicely.
The potato base is neutral enough that you can easily adjust the seasoning without changing the method.
They’re Made for Dipping
Ketchup is the obvious choice.
But don’t stop there.
Garlic dip, spicy mayonnaise, cheese sauce, ranch-style dips, and other creamy sauces all work beautifully with crispy potato smileys.
This is the kind of snack where putting two or three little bowls of sauce on the table suddenly makes everything feel like a proper snack platter.
Ingredient Overview
One of the best things about homemade potato smileys is how short the ingredient list is.
Potatoes
You’ll need four medium potatoes, boiled and peeled.
The potatoes need to be mashed until very smooth. Large lumps can make the dough harder to roll and may cause cracks when you’re shaping the smileys.
Take an extra minute with the masher here.
Smooth potato now means much easier smiley-making later.
Cornstarch
Cornstarch helps bind the mashed potatoes and contributes to the crisp exterior.
Three tablespoons is enough to give the potato mixture some structure without turning the inside dense.
Fine Breadcrumbs
Breadcrumbs absorb excess moisture and help create a potato dough that holds its shape.
Start with the amount listed in the recipe.
If your potatoes contain more moisture and the mixture remains sticky, add extra breadcrumbs gradually.
You want a soft, workable dough, not a dry one.
Salt and Black Pepper
Potatoes need seasoning.
Salt brings out their flavor, while black pepper gives the smileys a little savory warmth.
Red Chili Powder
This is completely optional.
Add it if you want a bit of heat, swap it for paprika for something milder, or leave it out entirely.
Cooking Oil
Use enough oil to allow the smileys to fry properly without sitting against the bottom of the pan.
A neutral cooking oil suitable for frying works best.
How to Make Homemade Potato Smileys
Mash the Potatoes Until Smooth
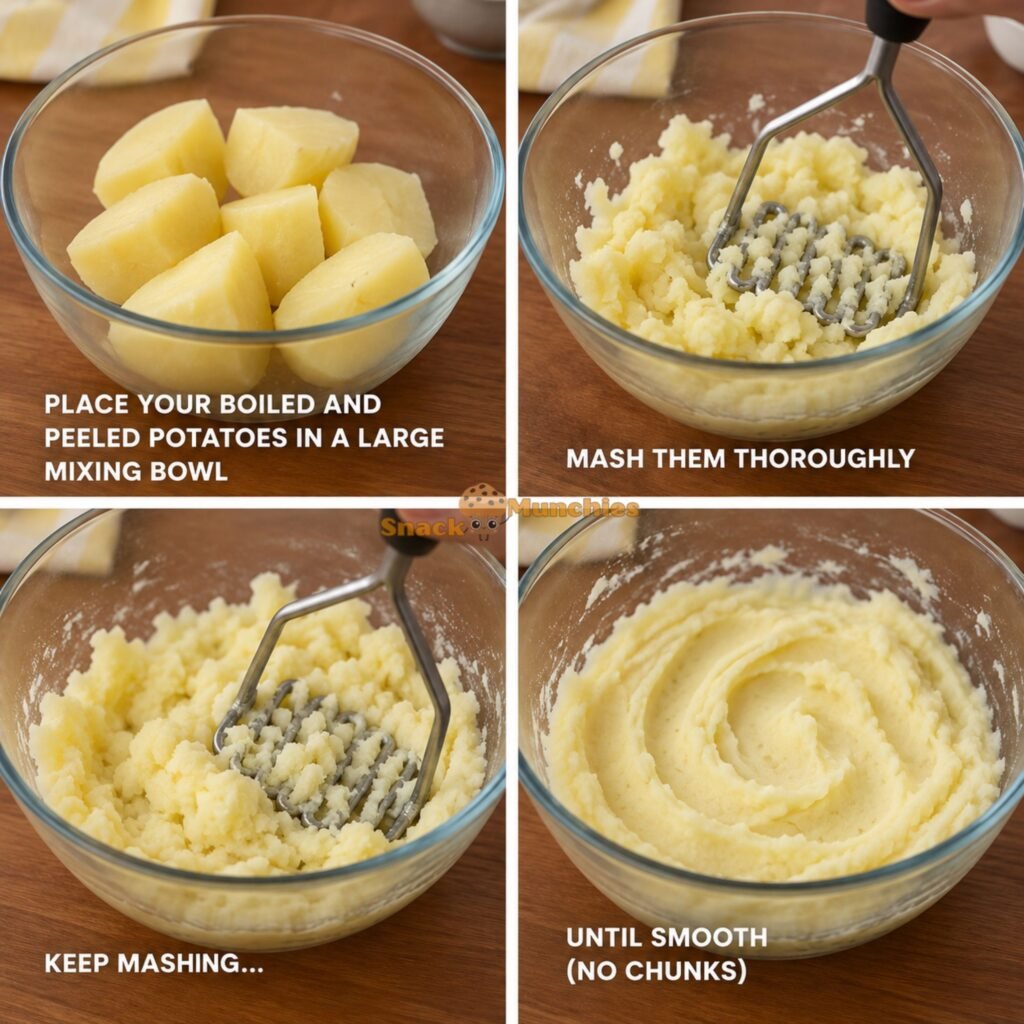
Place your boiled and peeled potatoes in a large mixing bowl.
Mash them thoroughly.
And when they look mashed, give them another few passes.
This isn’t the moment for rustic mashed potatoes with charming little chunks.
Those chunks can create weak spots in the dough and make your potato circles crack.
You’re looking for a smooth, even texture.
Make the Potato Dough
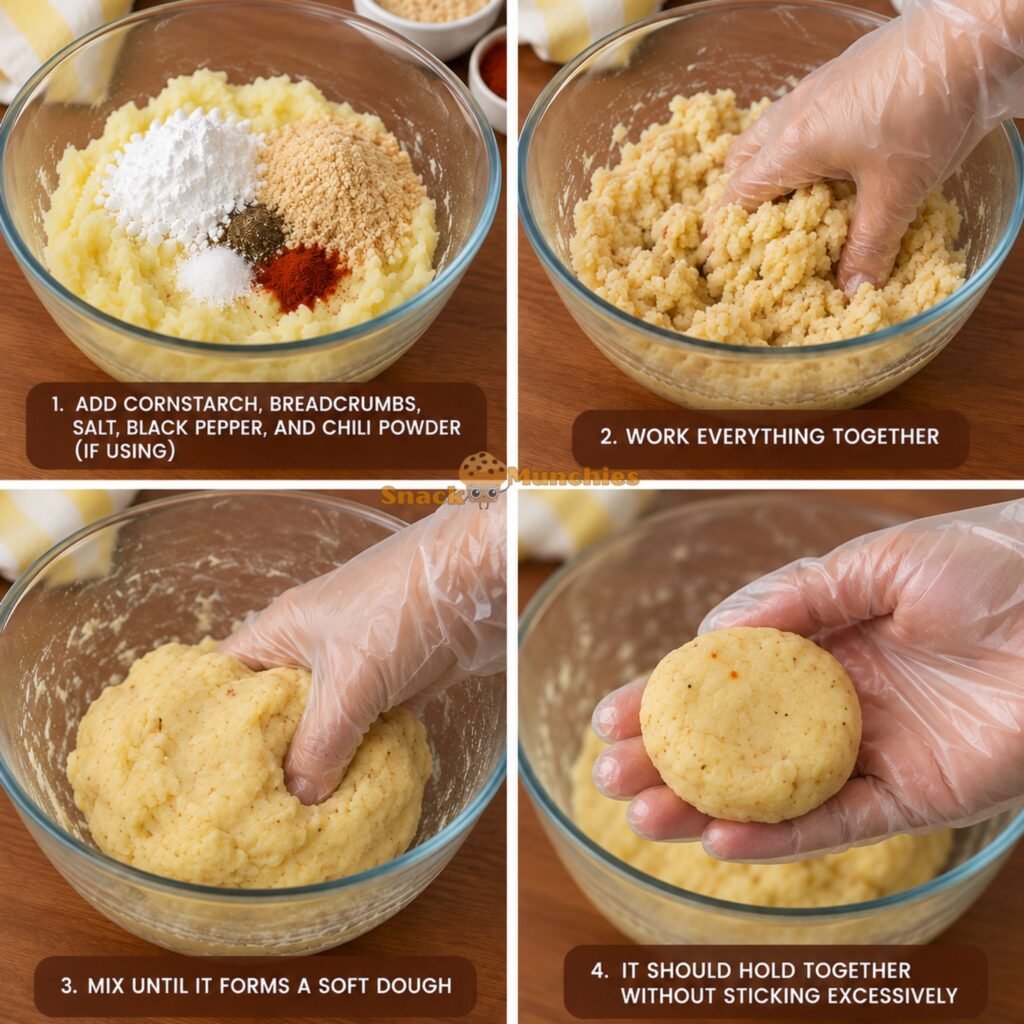
Add the cornstarch, fine breadcrumbs, salt, black pepper, and chili powder if you’re using it.
Work everything together until the ingredients are evenly distributed and the mixture begins behaving like a soft dough.
It should hold together without sticking excessively to your fingers.
If it’s very wet, add a little more breadcrumbs.
A little.
Not half the bag.
Adding too much at once can make the smileys dry and heavy instead of soft in the middle.
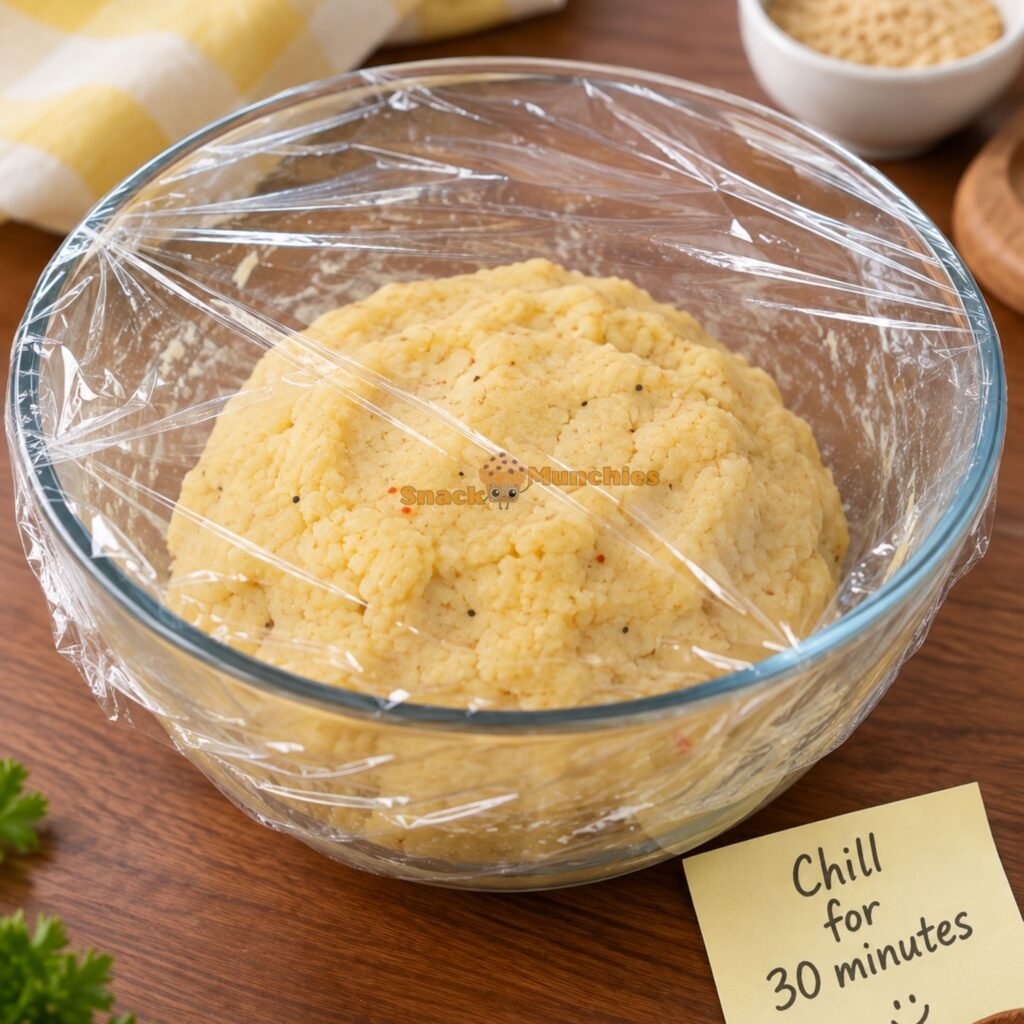
Chill for 30 Minutes
Cover the potato mixture or place it in a sealed container and refrigerate it for about 30 minutes.
Don’t be tempted to skip this because everyone is already asking when the smiley fries will be ready.
Chilling firms the mixture and makes it significantly easier to roll, cut, and decorate.
More importantly, firmer smileys are less likely to lose their faces during frying.
We worked hard on those smiles.
Protect them.
Roll Out the Potato Mixture
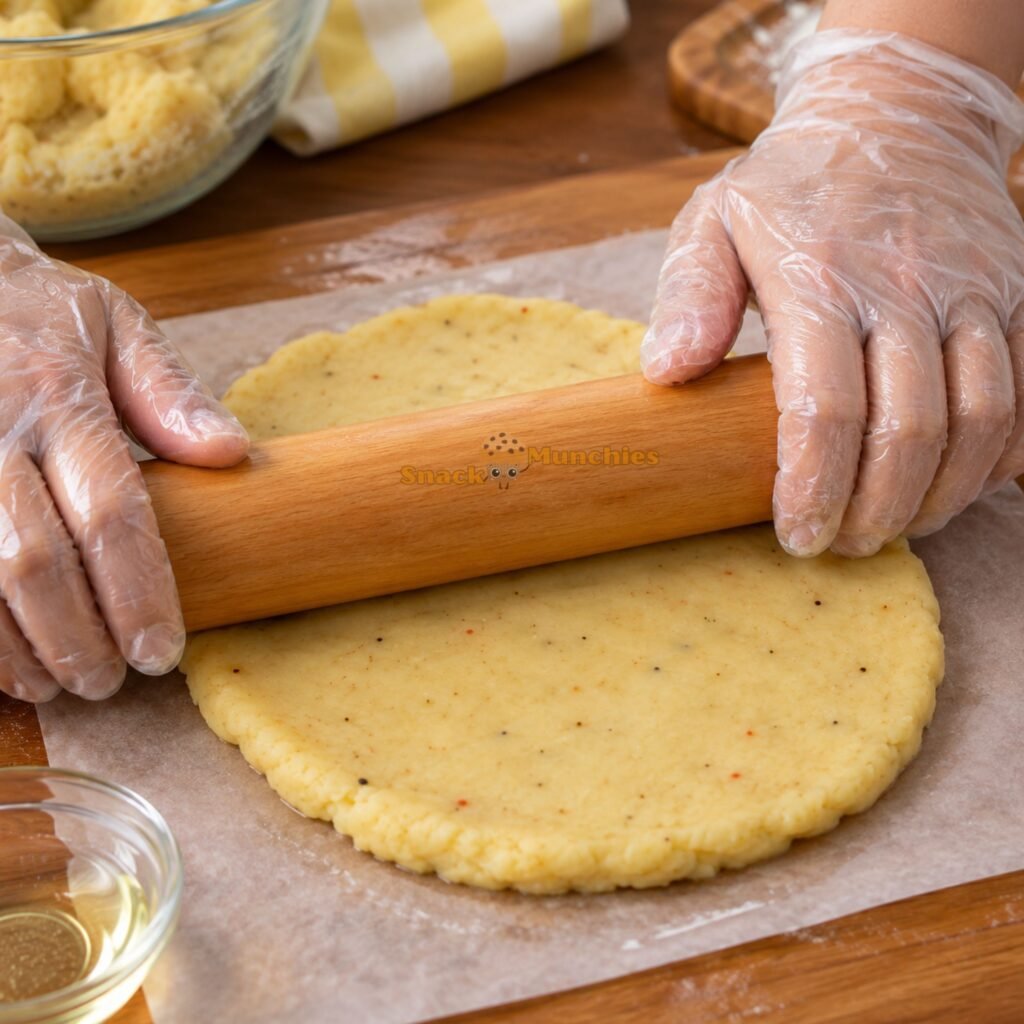
Lightly grease your hands and work surface.
Roll or gently press the chilled potato mixture until it’s approximately 1/2 centimeter thick.
Try to keep the thickness reasonably even.
If some are very thin and others are thick, they’ll cook at different speeds.
Cut the Circles
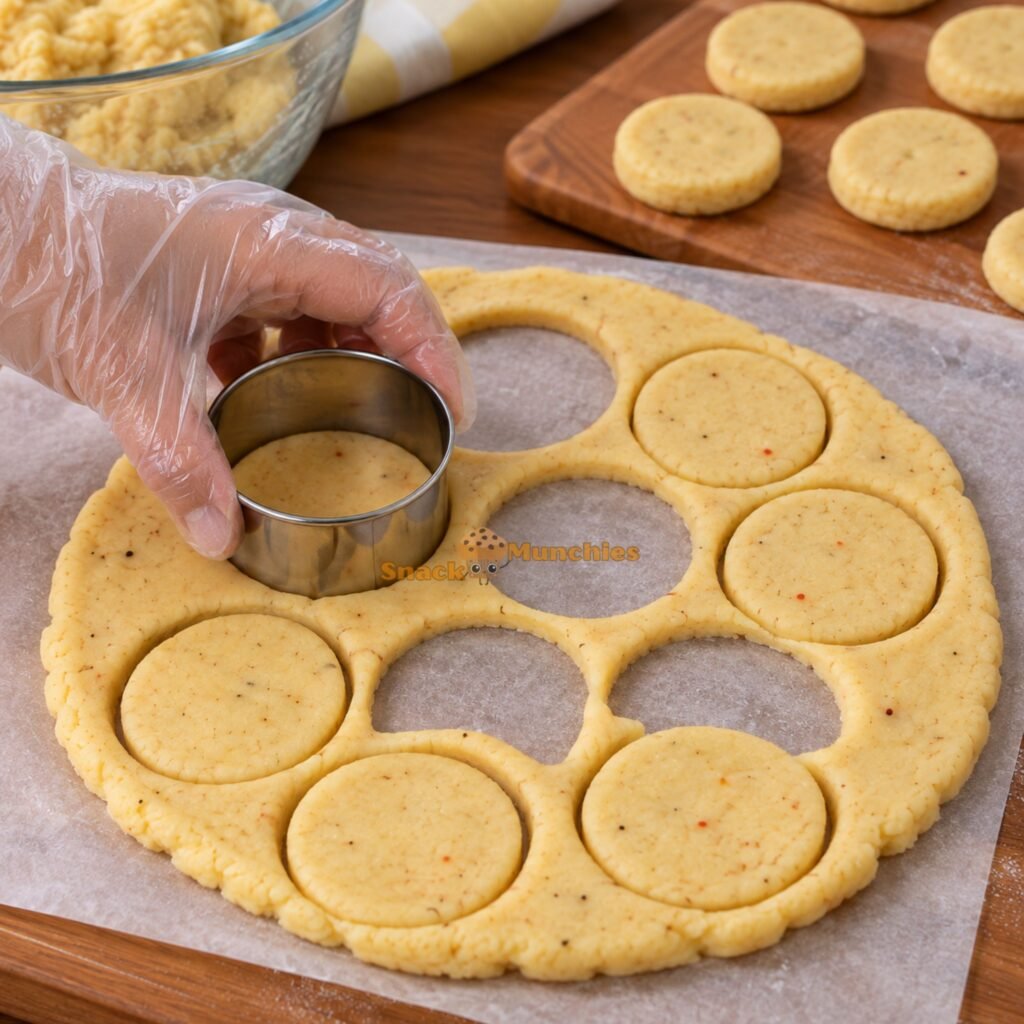
Use a round cookie cutter to cut circles from the potato dough.
Place each circle carefully onto a cutting board or another lightly greased surface.
Gather the scraps together, gently reshape them, and roll again.
Continue until you’ve used as much of the potato mixture as possible.
Depending on the size of your cutter, you should get around 15 potato smileys.
Give Them Faces
Now for the best part.
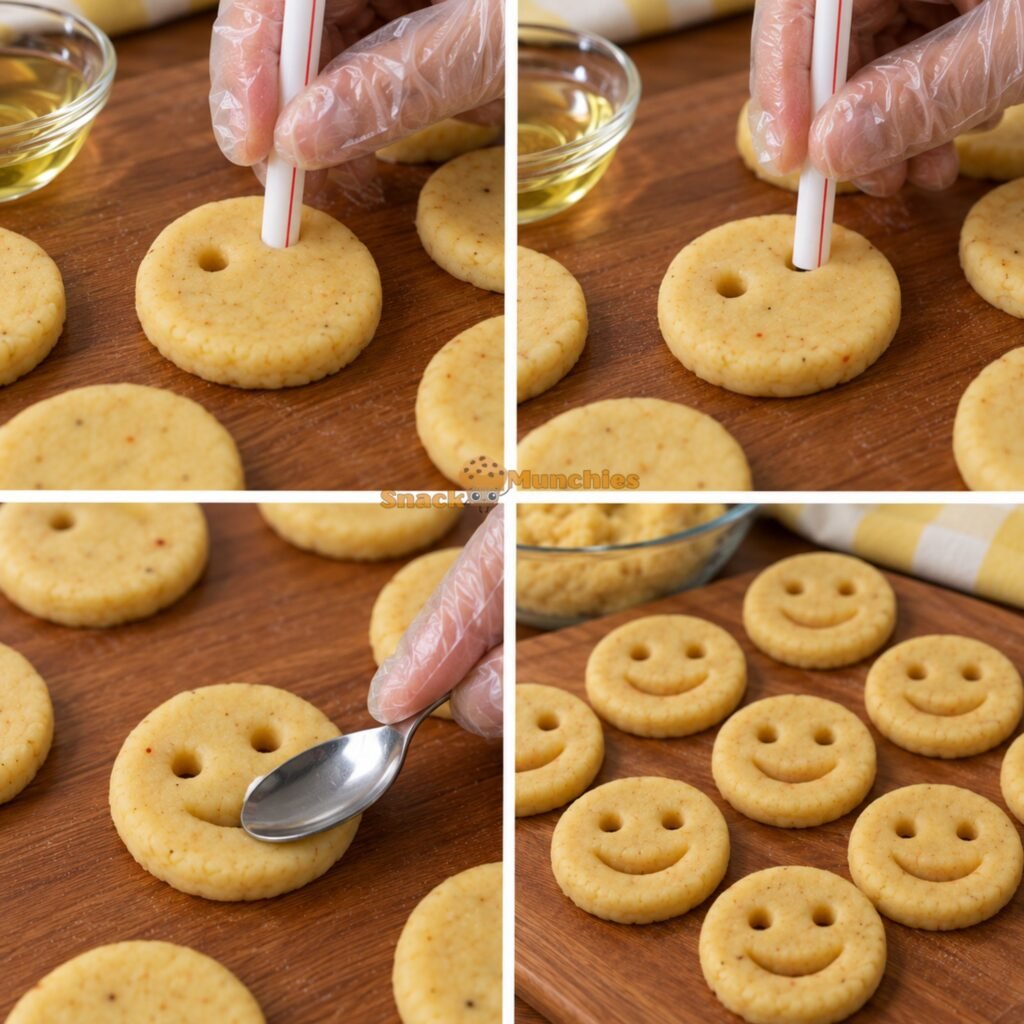
Lightly oil the end of a drinking straw.
Press it through each potato circle twice to make two eyes.
For the mouth, take the curved edge of a spoon and gently press it into the potato.
And there it is.
A smile.
Repeat until you have a small army of potatoes looking suspiciously happy about what’s coming next.
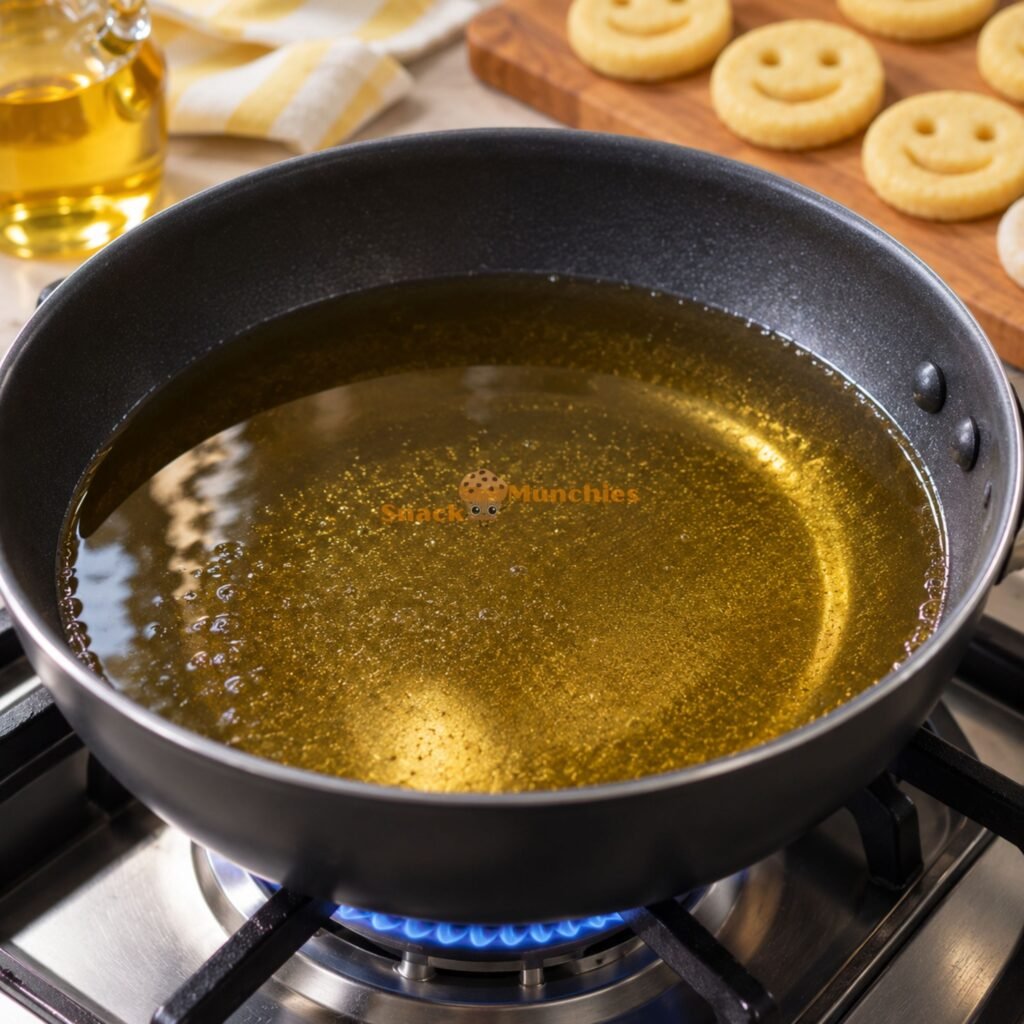
Heat the Oil
Add enough cooking oil to a deep frying pan and heat it over medium heat.
The oil needs to be properly hot before the smileys go in.
If the oil isn’t hot enough, the potato pieces can absorb more oil and become heavy instead of crisp.
Fry Until Golden
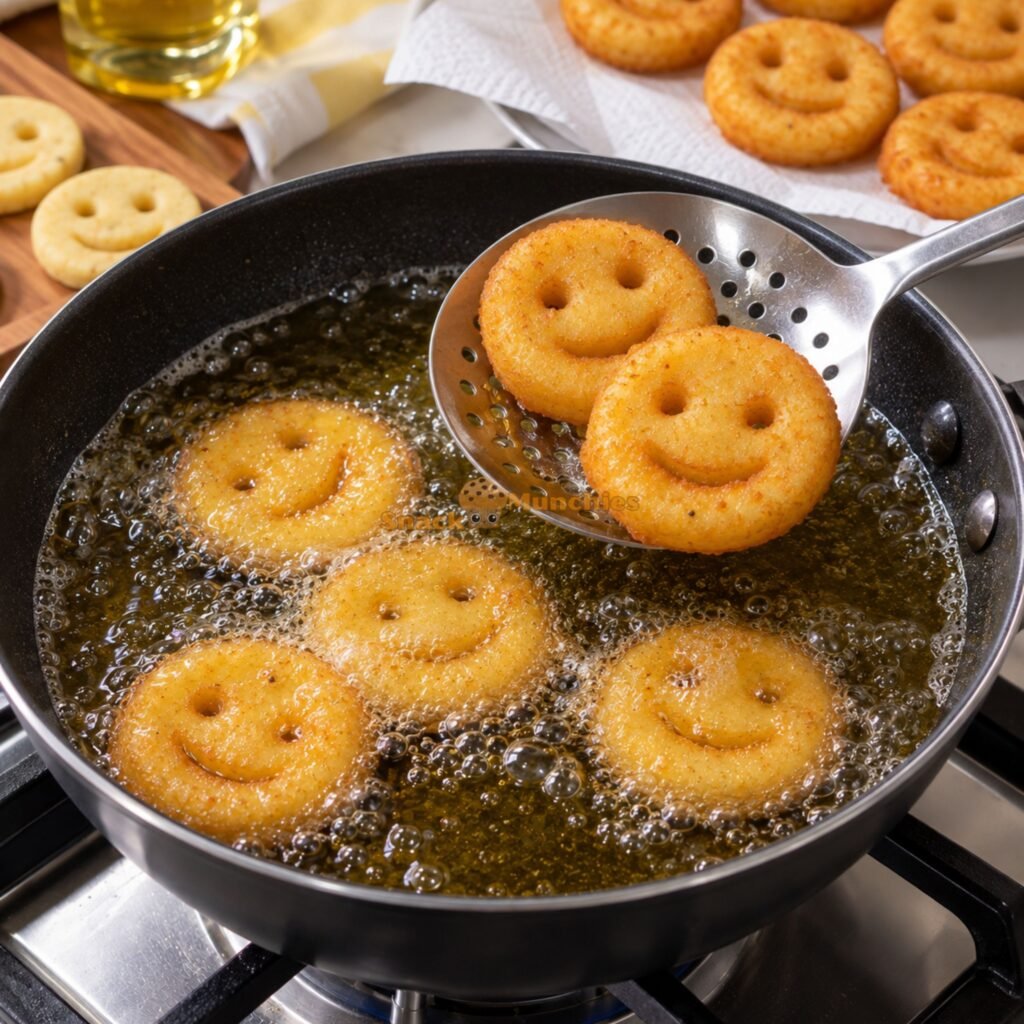
Carefully lower a few smileys into the oil.
Don’t crowd the pan.
Give them enough room for the oil to circulate around each piece.
Fry for approximately 3 to 4 minutes on each side, or until the exterior looks evenly golden and crisp.
Work in batches until all of the smileys are cooked.
Transfer them to a paper towel-lined plate using a slotted spoon.
Then try to wait at least long enough that you don’t burn your mouth.
Helpful Tips and Variations
Keep the Potato Mixture Smooth
This is probably the most important shaping tip.
The smoother the mashed potatoes, the easier it is to roll and cut the dough.
If you can see obvious potato chunks before adding the other ingredients, keep mashing.
Don’t Add Too Many Breadcrumbs
Breadcrumbs are useful when the mixture is sticky, but they’re not something you want to add recklessly.
Add a little at a time.
The mixture should be soft enough that the centers stay fluffy after frying.
Make Them Mild for Kids
Leave out the chili powder and stick with salt and black pepper.
Paprika is another option if you want extra color and flavor without much heat.
Try the Air Fryer
Don’t want to deep fry?
You can make potato smileys in an air fryer.
Cook them at 390°F (200°C) for approximately 10 to 12 minutes, turning halfway through.
The texture will be slightly different from deep-fried smileys, but you’ll still get a nicely crisp exterior.
Experiment With the Faces
Once you realize the potato dough is basically edible craft material, things can get interesting.
Keep the classic smile, make the mouths a little bigger, or change the eye positions.
They don’t need to look factory-perfect.
Honestly, slightly wonky smiles have more personality anyway.
Common Mistakes to Avoid
Leaving Lumps in the Potatoes
Large potato pieces make the mixture harder to shape and can create cracks.
Mash thoroughly before adding anything else.
Skipping the Chill Time
The mixture may feel workable immediately, but chilling makes a noticeable difference.
Warm, soft potato dough is more difficult to cut cleanly and can lose its shape more easily.
Give it the full 30 minutes.
Making the Smileys Too Thin
Very thin potato circles can become fragile and may crisp too quickly before the inside develops the texture you want.
Aim for approximately 1/2 centimeter thick.
Overcrowding the Frying Pan
Adding too many smileys at once can lower the oil temperature.
Instead of crisping quickly, they may absorb more oil.
Fry them in small batches.
It takes a little longer, but crispy potatoes are worth an extra few minutes.
Frying in Oil That Isn’t Hot Enough
If the oil is still warming when the smileys go in, you’ll miss that quick crisping action.
Let the oil heat properly before starting your first batch.
Ingredient Substitutions
Cornstarch
Cornstarch is particularly useful here because it helps bind the potato while supporting a crisp exterior.
If you’re experimenting with another starch, keep in mind that the amount and final texture may change.
For the most predictable result, stick with cornstarch.
Breadcrumbs
Fine breadcrumbs work best because they disappear easily into the potato mixture.
If your breadcrumbs are particularly coarse, crushing them more finely before adding them can help create a smoother dough.
Chili Powder
Paprika is an easy substitute when you want flavor without as much heat.
Or simply leave the spice out.
The smileys will still have plenty of savory potato flavor from the salt and black pepper.
What to Serve With Potato Smileys
First, bring on the dips.
Ketchup is classic for a reason. Its sweet, tangy flavor cuts through the richness of the fried potato perfectly.
Garlic dip is excellent if you want something creamy, while spicy mayonnaise adds another layer of heat for anyone who thinks the optional chili powder wasn’t quite enough.
You can also serve the smileys with cheese sauce, a creamy herb dip, or several sauces at once and turn them into a proper snack platter.
For another soft, salty snack to add alongside them, Homemade Soft Pretzels from Snack and Munchies make a fun pairing. Put both on a big platter with several dips in the middle and suddenly an ordinary snack feels much more interesting.
Potato smileys can also work as a playful side for burgers, sandwiches, wraps, or grilled dishes. Think of them as a homemade alternative to regular fries.
For parties, arrange them on a large platter and place the sauces in small bowls around the edges.
Just don’t expect the smileys to sit there looking cute for very long.
The crispiest ones tend to disappear first.
Storage and Reheating Tips
Potato smileys are at their absolute best shortly after frying.
That’s when the exterior is at its crispiest and the center is warm and fluffy.
If you do have leftovers, allow them to cool before transferring them to an airtight container and refrigerating.
When you’re ready to eat them again, skip the microwave if crispiness is your priority.
Microwaving can make the exterior soft.
Instead, reheat them in an air fryer or oven until hot and crisp again.
An air fryer is especially convenient because the circulating heat helps bring back some of that freshly fried texture.
If you’re preparing for a party or busy afternoon, you can also make and shape the potato smileys ahead of time. Keep the uncooked pieces chilled until you’re ready to fry them.
That way, most of the messy work is already finished and you can serve them warm.
Final Thoughts
Maybe it’s the crispy golden edges.
Maybe it’s the fluffy potato middle.
Maybe it’s the fact that your snack is literally smiling at you.
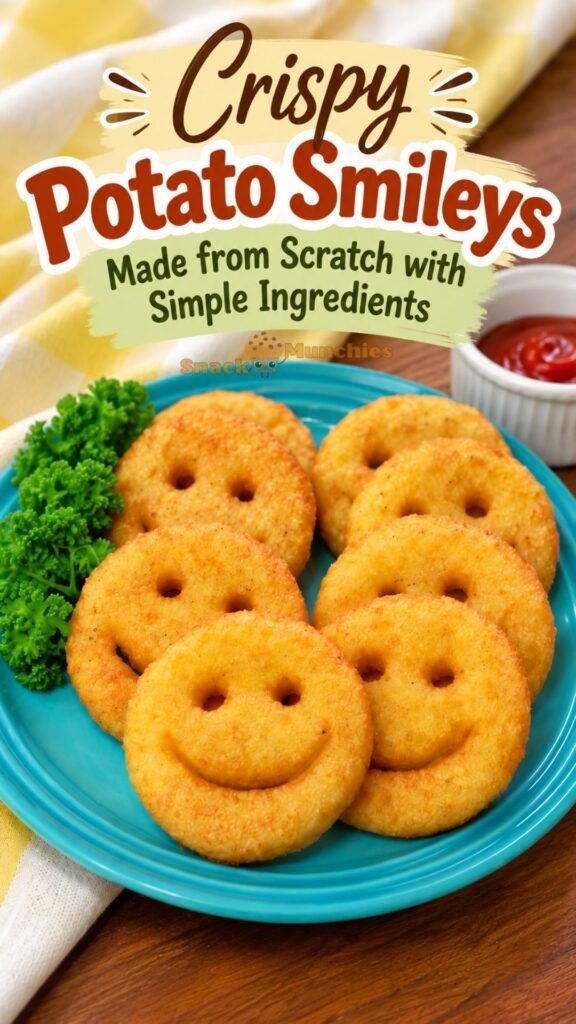
Whatever the reason, homemade potato smileys are much more fun than an ordinary plate of fries.
They use simple ingredients, don’t require fancy shaping equipment, and give you plenty of opportunities to customize the seasoning.
Keep them mild for kids.
Add chili powder for the adults.
Put three dipping sauces on the table and pretend you’re giving everyone options when you know perfectly well they’re going to try all three.
And don’t worry if every smiley doesn’t look identical.
One might have crooked eyes.
Another might have an enormous grin.
One will inevitably look slightly concerned.
That’s part of making them yourself.
As long as they’re golden, crispy, fluffy in the middle, and ready for dipping, they’re doing their job.
Although you may want to consider making a double batch.
Fifteen smiling potatoes can disappear remarkably fast.
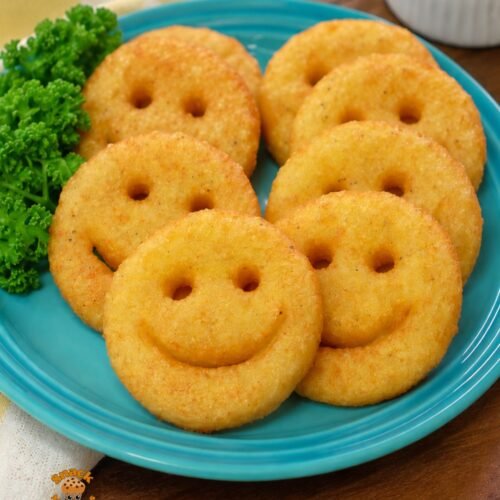
Crispy Homemade Potato Smileys
Equipment
- Mixing bowl
- potato masher
- Rolling Pin
- round cookie cutter
- drinking straw
- spoon
- cutting board
- deep frying pan or deep fryer
- slotted spoon
- paper towels
Ingredients
- 4 medium potatoes boiled and peeled
- 3 tablespoons cornstarch
- 6 tablespoons fine breadcrumbs plus additional breadcrumbs if needed
- 1 teaspoon salt
- 1 teaspoon ground black pepper
- 1 teaspoon red chili powder optional
- Cooking oil for deep frying
Instructions
- Place the peeled, cooked potatoes in a large mixing bowl. Mash thoroughly until smooth and free from noticeable lumps.
- Add the cornstarch, breadcrumbs, salt, black pepper, and chili powder. Work everything together until you have a soft dough that holds its shape without sticking excessively to your hands. Add a small amount of extra breadcrumbs if the mixture feels too wet.
- Cover the potato mixture or place it in a sealed container. Refrigerate for 30 minutes to make the dough firmer and easier to shape.
- Lightly grease your hands and work surface. Roll or gently press the chilled potato mixture to approximately ½ centimeter thick.
- Cut the flattened dough into circles using a round cookie cutter. Gather any leftover scraps, reshape them, and continue cutting until the dough is used.
- Lightly coat the end of a drinking straw with oil, then press it through each potato circle twice to form the eyes.
- Create the smiling mouth by carefully pressing the curved edge of a spoon into each circle.
- Heat enough cooking oil for frying in a deep pan over medium heat.
- Carefully lower a few potato smileys into the hot oil without overcrowding the pan. Fry for approximately 3 to 4 minutes on each side, or until crisp and evenly golden.
- Remove with a slotted spoon and transfer to a paper towel-lined plate to absorb excess oil.
- Serve while warm and crispy with ketchup, garlic dip, spicy mayonnaise, or your favorite dipping sauce.
Notes
- Make sure the potatoes are mashed very smoothly so the smileys are easier to shape and do not develop cracks.
- If the potato mixture remains sticky after chilling, gradually work in a little more breadcrumbs rather than adding a large amount at once.
- Paprika can replace the chili powder for a milder flavor, or the spice can be omitted when preparing these for children.
- Chilling is important because it firms the potato mixture and helps the smiley faces hold their shape during frying.
- Avoid overcrowding the frying pan, as this can lower the oil temperature and result in less crispy smileys.
- For an alternative to deep frying, cook the smileys in an air fryer at 390°F (200°C) for approximately 10 to 12 minutes, turning them halfway through.
