
Some recipes disappear fast.
These Oreo Energy Balls never stand a chance.
You make a batch with the best intentions. Maybe they’re for a holiday dessert tray. Maybe you’re bringing them to a party. Maybe you’re planning to share them with family.
Then you walk past the refrigerator.
You grab one.
A little later, you grab another.
By evening, you’re wondering why there are only twelve left.
It happens.
These little chocolate-covered bites are the dessert equivalent of “just one more episode.” You fully intend to stop after one. Then somehow you’re reaching for another before you’ve even finished the first.
The reason is simple.
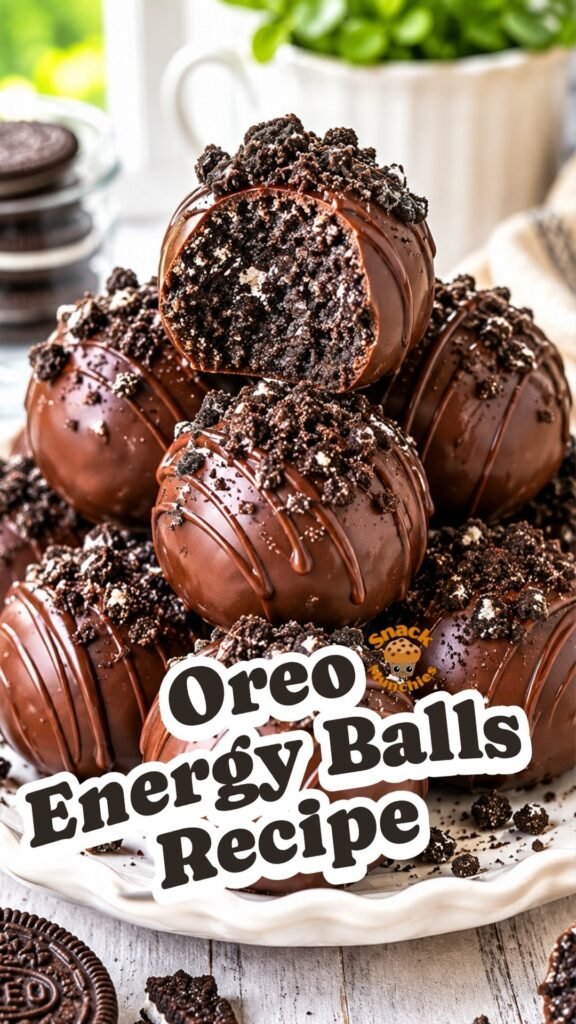
Every bite delivers a perfect combination of textures. The center is rich, creamy, and packed with that familiar cookies-and-cream flavor everyone loves. The outside is coated in smooth chocolate that hardens into a delicate shell.
That first bite is the dangerous part.
The chocolate gives a slight snap.
The Oreo filling melts into a soft, creamy texture.
The cookie flavor hits immediately.
And suddenly the idea of stopping at one feels completely unrealistic.
The best part?
No baking.
No complicated techniques.
No long ingredient list.
Just a handful of ingredients and about twenty minutes of hands-on work standing between you and a tray full of ridiculously good Oreo Energy Balls.

Why You’ll Love These Oreo Energy Balls
They Taste Like Chocolate Truffles and Cookies and Cream Had a Baby
Rich Oreo crumbs.
Creamy filling.
A silky chocolate coating.
Every bite feels like something you’d grab from a fancy bakery display case.
Except you made them yourself.
No Oven Required
There are days when turning on the oven feels like way too much effort.
This recipe understands that.
Everything comes together with mixing, rolling, chilling, and dipping.
That’s it.
They’re Perfect for Every Occasion
Holiday cookie trays.
Birthday parties.
Baby showers.
Movie nights.
Tuesday afternoons when you need something sweet.
These Oreo Energy Balls somehow fit every situation.
Everyone Loves Them
Even people who claim they aren’t dessert people suddenly become dessert people when these show up.
Funny how that works.
Ingredient Overview
One of the best things about this recipe is how a few simple ingredients transform into something that tastes surprisingly decadent.
Chocolate Sandwich Cookies
Thirty-six cookies may seem like a lot.
Trust the process.
Once crushed, they become the foundation of the entire dessert, creating that deep chocolate cookie flavor that makes these bites completely irresistible.
The smell alone when you open the package is enough to make you want to start snacking immediately.
Cream Cheese
This is where the magic happens.
Cream cheese turns ordinary cookie crumbs into a rich, velvety filling that feels almost like chocolate truffle centers.
If you’ve ever licked the spoon while making cheesecake filling, you’re already familiar with the level of temptation we’re dealing with here.
Semi-Sweet Chocolate
The coating balances everything beautifully.
Sweet, but not too sweet.
Rich without being overwhelming.
As it hardens around the Oreo center, it creates that satisfying contrast between the creamy filling and the chocolate shell.
Coconut Oil
Optional, but helpful.
It makes the melted chocolate extra smooth and glossy, giving your Oreo Energy Balls that polished bakery-style finish.
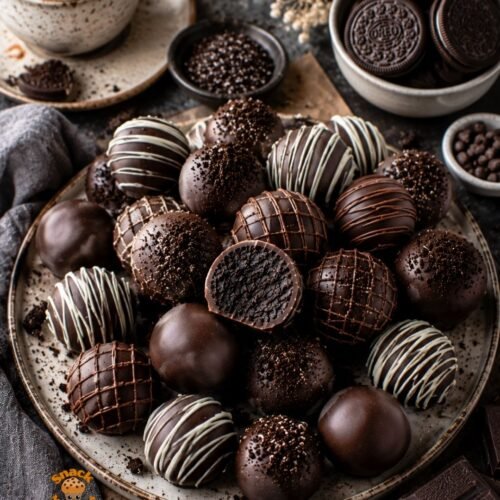
Fun Toppings
This is where you can get creative.
Crushed Oreo crumbs add crunch.
Chocolate sprinkles add texture.
White chocolate drizzles make them look professionally decorated.
Seasonal sprinkles instantly turn them into holiday treats.
Tiny details.
Big payoff.
How to Make Oreo Energy Balls
Turn the Cookies Into Crumbs
Add the cookies to a food processor and blend until they resemble fine chocolate sand.
No large chunks.
No big pieces.
Just soft, fluffy crumbs.
The finer the crumbs, the smoother the finished filling.
Mix Everything Together
Add the cream cheese and stir until every crumb is coated.
At first, it may seem like the mixture won’t come together.
Keep going.
Suddenly it transforms into a thick, rich dough that smells suspiciously good.
Don’t be surprised if you find yourself sampling a little.
Quality control is important.
Roll Into Bite-Sized Balls
Scoop about a tablespoon of the mixture and roll it between your palms.
The goal is smooth, round little bites that look almost too cute to eat.
Almost.
Chill Until Firm
This step matters.
Cold Oreo balls are easier to dip and hold their shape beautifully.
Plus, it gives you time to stop eating the filling.
Hopefully.
Dip in Melted Chocolate
Now comes the best part.
Drop each chilled Oreo ball into silky melted chocolate and coat it completely.
As the excess chocolate drips away, a smooth shell forms around the creamy center.
This is the moment when they start looking bakery-worthy.
Decorate Before the Chocolate Sets
Work quickly.
Sprinkle on crushed cookies.
Add festive toppings.
Drizzle melted white chocolate across the tops.
The decorations stick best while the coating is still glossy and soft.
Let Them Set
Once chilled, the chocolate hardens into a smooth shell.
And that’s when the magic happens.
The first bite delivers creamy Oreo filling wrapped inside rich chocolate.
Soft meets crisp.
Creamy meets crunchy.
Sweet meets chocolatey.
It’s a tiny dessert with a surprisingly big payoff.

Helpful Tips and Variations
Use Full-Fat Cream Cheese
This isn’t the time for shortcuts.
Full-fat cream cheese creates the smoothest, richest texture.
Keep Everything Cold
If the Oreo balls become too soft during dipping, place them back in the refrigerator for a few minutes.
Cold centers make the entire process easier.
Experiment With Different Chocolates
Semi-sweet is classic, but don’t stop there.
Try:
- Milk chocolate
- Dark chocolate
- White chocolate
- Cookies-and-cream coating
Each version feels like an entirely new dessert.
Try Different Oreo Flavors
Golden Oreos create a vanilla version.
Mint Oreos add a refreshing twist.
Peanut butter Oreos are outrageously good.
There are no bad choices here.
Common Mistakes to Avoid
Skipping the Chill Time
Warm Oreo balls can become messy during dipping.
Patience pays off.
Overheating the Chocolate
Chocolate melts surprisingly quickly.
Use short bursts and stir frequently.
Waiting Too Long to Decorate
Once the coating hardens, toppings won’t stick.
Decorate immediately after dipping.
Using Cold Cream Cheese
Soft cream cheese blends smoothly.
Cold cream cheese creates lumps and frustration.
Nobody wants that.
Ingredient Substitutions
Need a few swaps?
No problem.
- Use dark chocolate for a richer coating.
- Use white chocolate for extra sweetness.
- Substitute mascarpone for cream cheese if needed.
- Try flavored sandwich cookies for fun variations.
These little bites are surprisingly flexible.
What to Serve With Oreo Energy Balls
They pair beautifully with:
- Fresh coffee
- Hot chocolate
- Cold milk
- Vanilla ice cream
- Dessert charcuterie boards
Storage and Reheating Tips
Store Oreo Energy Balls in an airtight container in the refrigerator for up to one week.
Honestly, lasting a week may be the biggest challenge.
For longer storage, freeze them for up to two months.
When you’re ready to enjoy them, let them thaw for a few minutes and dig in.
Some people even prefer them slightly frozen.
The centers become extra fudgy and almost ice-cream-like.

Frequently Asked Questions
Are Oreo Energy Balls the same as Oreo truffles?
Yes. The names are often used interchangeably.
Can I make them ahead of time?
Absolutely. They’re perfect for making a day or two before serving.
Can I freeze them?
Yes. Freeze for up to two months in an airtight container.
Do I need a food processor?
No. A rolling pin and a sturdy zip-top bag work surprisingly well.
What chocolate works best?
Semi-sweet chocolate provides the best balance, but milk, dark, and white chocolate all work beautifully.
Final Thoughts
If there’s a dessert that proves simple recipes can still steal the show, it’s these Oreo Energy Balls.
They’re rich without being complicated.
Impressive without being difficult.
And dangerously easy to keep reaching for.
Make a batch for a party and watch them disappear.
Make a batch for yourself and try not to visit the refrigerator every hour.
Either way, don’t be surprised when these become one of those recipes you keep coming back to again and again.
Because once you’ve had that creamy Oreo center wrapped in a crisp chocolate shell, it’s hard to forget.
Oreo Energy Balls
Equipment
- Food processor or blender
- Mixing bowl
- Measuring cups
- baking tray
- Parchment paper
- microwave-safe bowl
- fork or dipping tool
Ingredients
For the Oreo Centers
- 36 chocolate sandwich Oreo cookies (about 14 ounces), finely crushed
- 8 ounces cream cheese, softened
For the Chocolate Coating
- 12 ounces semi-sweet chocolate, chopped or chips
- 1 tablespoon coconut oil (optional)
Optional Garnishes
- Finely crushed cookie crumbs
- Chocolate sprinkles
- Melted white chocolate
- Colored decorating sprinkles
Instructions
- Add the sandwich cookies to a food processor and blend until they reach a fine crumb consistency.
- Transfer the cookie crumbs to a large mixing bowl. Add the softened cream cheese and stir until a thick, uniform mixture forms with no dry crumbs remaining.
- Line a baking tray or plate with parchment paper.
- Scoop approximately 1 tablespoon of the mixture and roll into smooth balls. Arrange them on the prepared tray.
- Refrigerate the cookie balls for at least 30 minutes, or until firm enough to handle easily.
- Place the chocolate and coconut oil, if using, into a microwave-safe bowl. Heat in short intervals, stirring frequently, until completely melted and silky smooth.
- Remove the chilled balls from the refrigerator. Using a fork or dipping tool, coat each ball in the melted chocolate, allowing any excess to drip off.
- Return the coated balls to the parchment-lined tray.
- Before the chocolate hardens, decorate with crushed cookies, sprinkles, or a drizzle of melted white chocolate.
- Let the coating set completely. For faster results, refrigerate for 10 to 15 minutes.
- Serve chilled or allow them to sit briefly at room temperature before enjoying.
Notes
- Full-fat cream cheese provides the smoothest texture and richest flavor.
- Keeping the cookie balls cold makes dipping easier and helps maintain their shape.
- Semi-sweet, milk, dark, or white chocolate can all be used for the outer coating.
- For a festive presentation, use seasonal sprinkles or colored chocolate drizzles.
- Store leftovers in an airtight container in the refrigerator for up to 1 week or freeze for up to 2 months.